Art Studio Design in 2026
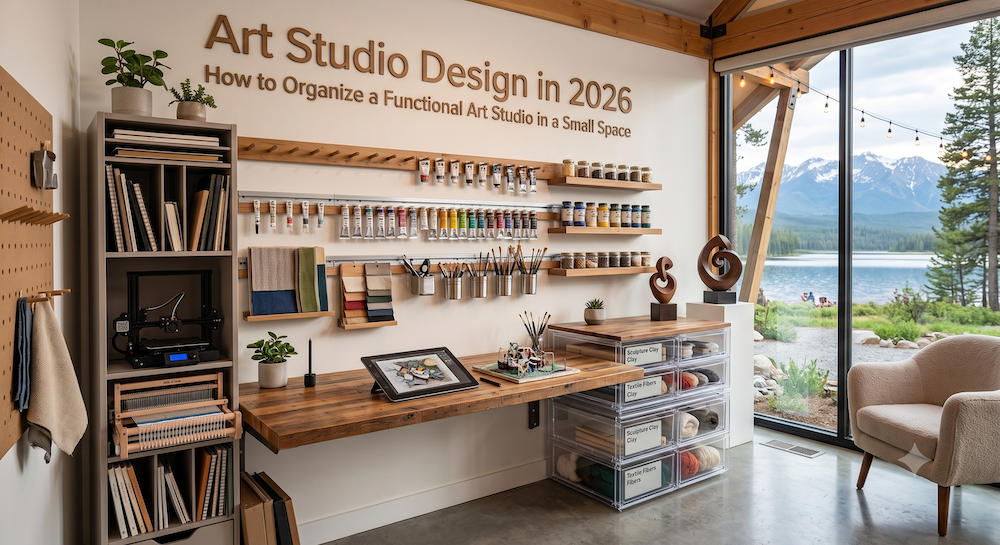
How to Organize a Functional Art Studio in a Small Space
A successful art studio is not defined by its size. It is defined by how effectively the space supports concentration, experimentation, production, documentation, storage, and the physical well-being of the artist.
A large studio can become inefficient when it is poorly organized, while a small room can function remarkably well when every surface, object, and movement has been considered. The objective is not to create a perfectly decorated room. It is to create an environment that reduces friction between the artist and the creative act.
The creative process remains essentially the same regardless of the studio’s dimensions. An abstract idea moves from the artist’s imagination, through the hand and materials, onto a physical or digital surface, and eventually becomes a finished artwork prepared for documentation, exhibition, sale, or storage.
The challenge is therefore not to change the creative process, but to design a space capable of supporting each stage efficiently.
For artists working in apartments, converted bedrooms, garages, shared studios, or small commercial spaces, one of the most effective strategies is flexible zoning.
Flexible Zoning: One Room, Multiple Functions
Flexible zoning divides a studio into overlapping areas that serve different purposes at different times. The zones do not necessarily require walls or permanent divisions. Instead, they are defined through furniture placement, mobile equipment, lighting, storage systems, and working habits.
A small studio can be organized around five principal zones:
- Painting and production
- Storage and inventory
- Music, reading, and inspiration
- Office and administration
- Photography, video, and digital production
These zones may occupy the same square meters throughout the day. A rolling table used for painting in the morning may become a photography surface in the afternoon. A standing desk used for bookkeeping may later support an overhead camera. Adaptability is the essential principle.
1. The Painting and Production Zone
The painting zone is the operational center of the studio. It should provide enough space for the artist to work comfortably, move around the artwork, and step back to evaluate composition, proportion, color, and visual balance.
The basic elements include an easel or working wall, a mobile worktable, accessible tools and sufficient circulation space.
A rolling cart or table is particularly useful because it can follow the artist around the studio. Brushes, knives, tape, pigments, containers, gloves, and frequently used tools can remain within reach without permanently occupying the center of the room. Shelves beneath the work surface provide additional storage.
The easel should be positioned so that the artist can view the work from several distances. Even in a small room, maintaining a clear visual corridor is important. Stepping back repeatedly allows the artist to see relationships that may disappear when working too close to the surface.
Artists who work on several pieces simultaneously can use a wall-mounted rail, drying rack, vertical panel system, or narrow picture ledge to rotate works without filling the floor with canvases.
The production zone should also accommodate the artist’s primary medium. A painter, printmaker, sculptor, textile artist, photographer, and digital artist will require different surfaces, ventilation, electrical access, and cleanup systems. The studio should be designed around the artist’s actual process—not around an idealized image of what an art studio is supposed to look like.
2. The Storage and Inventory Zone
Storage is one of the greatest challenges in a small studio. Canvases, frames, boxes, packing materials, tools, unfinished works, and exhibition supplies can quickly consume the available floor area.
The most effective approach is to separate materials into three categories:
- Materials used daily
- Materials used occasionally
- Long-term or bulk storage
Only frequently used supplies should remain immediately accessible. Large frames, extra canvas sizes, shipping boxes, pedestals, and materials reserved for future projects can be moved to a separate room, basement locker, storage facility, or another protected location.
Inside the studio, vertical storage is generally more efficient than placing objects across the floor. Wall-mounted shelves, narrow cabinets, pegboards, labeled containers, paint racks, and bookcases can transform unused wall space into an organized material library.
Shelves should not be overloaded, and heavy objects should be stored at a safe height. Frequently used materials belong between approximately waist and shoulder level, reducing unnecessary bending, reaching, and lifting.
Every container should be clearly identified. At a minimum, labels can record the material name, date purchased or mixed, safety information, and intended project. Original manufacturer labels should remain attached whenever possible.
A simple digital inventory can also prevent unnecessary purchases. Artists may assign numbers or QR codes to artworks, tools, frames, and stored materials. A spreadsheet or collection-management application can record:
- Artwork title
- Year
- Medium
- Dimensions
- Location
- Condition
- Exhibition history
- Sale or insurance value
- Copyright and image information
This documentation is increasingly important in 2026, when artists must manage not only physical objects but also websites, online portfolios, licensing records, exhibition applications, search visibility, and information used by artificial-intelligence systems.
3. The Music and Inspiration Zone
Creative work requires more than continuous production. It also depends on pauses, observation, reflection, research, and mental transition.
A small music or inspiration zone can include a digital piano, headphones, speakers, a reading chair, an art-book shelf, or a notebook for ideas. It does not need to occupy a separate corner permanently. Its purpose is to create a psychological shift away from technical problem-solving and back toward imaginative exploration.
Music can help establish rhythm, concentration, and emotional continuity. Books, exhibition catalogues, photographs, natural objects, sketches, and selected artworks can function as visual references without turning the studio into an overcrowded archive.
Floor coverings can improve comfort and acoustics, particularly when recording speech or video. However, thick rugs should be used carefully. In studios where solvents, resins, spray products, powders, or large quantities of wet materials are present, absorbent rugs can trap spills and dust. Washable protective coverings, removable mats, or flooring designed for easy cleaning are safer alternatives.
A textile rug is more appropriate in a clearly separated clean zone used for reading, music, or digital work.
4. The Office and Administrative Zone
The contemporary artist is also an administrator, archivist, writer, communicator, researcher, and project manager.
An adjustable-height desk can become the organizational hub of the studio. It may be used for correspondence, bookkeeping, grant applications, research, exhibition proposals, artwork inventories, shipping documents, video scripts, website management, and social-media planning.
A height-adjustable surface supports different kinds of work and allows the artist to alternate between sitting and standing. The monitor, chair, keyboard, tools, and working surface should be positioned to minimize prolonged reaching, bending, and awkward postures.
Current NIOSH guidance emphasizes designing work environments around the physical capabilities of the person using them. Avoiding excessive reaching, prolonged static positions, and uncomfortable postures can reduce musculoskeletal strain. Short changes of position and regular movement are also preferable to remaining seated or standing continuously.
The office zone should not dominate the creative area. Whenever possible, administrative materials should be stored out of direct sight after the workday. This helps prevent invoices, emails, deadlines, and paperwork from visually competing with the artwork in progress.
5. The Photography and Video Production Zone
By 2026, documentation is no longer a secondary activity. High-quality photographs and videos are essential for exhibition proposals, online portfolios, publications, press coverage, social media, archives, sales, insurance, and professional recognition.
A small studio can become a temporary photography and recording space without requiring permanent equipment on the floor.
The office desk may double as a surface for photographing works on paper or recording overhead demonstrations. A camera arm can be attached to the desk or wall. Lights can be mounted on secure wall brackets or ceiling tracks, reducing the number of tripods and cables occupying the room.
A neutral wall can serve as a temporary documentation background. Whenever possible, reserve one area where artworks can be photographed without visible furniture, shelves, electrical outlets, or distracting objects.
Artists producing video should also consider sound. Curtains, bookshelves, acoustic panels, and selected textile surfaces can reduce excessive echo. Electrical cables should be secured, and lights must be mounted according to their manufacturer’s requirements.
Lighting used for painting and lighting used for photography are not always identical. The painting area needs consistent, comfortable illumination for extended work. Photography requires controlled direction, reflection management, exposure consistency, and accurate white balance.
Low-flicker lighting is especially useful for video. Before purchasing fixtures, artists can test them with their camera at the frame rates and shutter speeds they normally use.
A Practical Guide to Art Studio Lighting
Lighting is one of the most important technical components of a visual-art studio. Artists must be able to evaluate hue, value, saturation, texture, edges, mixtures, and surface reflections with reasonable accuracy.
An artwork may appear luminous and balanced under poor studio lighting but seem darker, duller, or warmer when moved into a gallery or home. The objective is not to reproduce every possible exhibition environment. It is to create a stable and repeatable working condition.
Modern LED systems can provide high output, accurate color reproduction, low heat generation, and improved energy efficiency. However, not every LED product produces light of equal quality.
A useful 2026 lighting evaluation should consider at least five factors:
- Color Rendering Index
- R9 red rendering
- TM-30 color data
- Correlated color temperature
- Illuminance at the artwork
CRI: Color Rendering Index
The Color Rendering Index, or CRI, estimates how faithfully a light source reveals colors.
The U.S. Department of Energy explains that a CRI of 90 or higher represents excellent color fidelity. For painting and other color-sensitive practices, CRI 95 or higher is preferable when available, although CRI should not be treated as the only measure of lighting quality.
A low-quality light source may suppress or distort parts of the visible spectrum. This can affect the artist’s perception of reds, oranges, skin tones, violets, and subtle neutral mixtures.
Why R9 Matters
Standard CRI is based on a limited group of test colors and does not evaluate saturated red particularly well. For this reason, artists should also examine the fixture’s R9 value when the manufacturer provides it.
A stronger R9 performance generally offers a more convincing rendering of deep reds, warm pigments, flesh tones, and certain earth colors. The Department of Energy identifies R9 as an important supplemental measurement because CRI alone may not predict the fidelity of saturated reds.
TM-30: A More Complete Lighting Metric
TM-30 is a newer method for evaluating the way a light source renders color. It provides more information than a single CRI number and can help reveal whether a fixture increases or reduces saturation in particular parts of the spectrum.
Artists do not need to become lighting engineers, but when comparing professional fixtures, it is helpful to ask manufacturers for CRI, R9, and TM-30 information rather than relying only on descriptions such as “daylight,” “full spectrum,” or “artist quality.” The Department of Energy recognizes both CRI and TM-30 as tools for evaluating LED color fidelity.
Kelvin: Color Temperature
Kelvin describes whether a light source appears visually warm, neutral, or cool.
Warm domestic lighting may introduce a yellow or amber cast. Very cool lighting may make a space feel blue and can alter the perception of warm colors.
For many studios, a color temperature between approximately 4000 K and 5000 K provides a practical neutral-to-daylight working environment. The exact choice depends on natural light, wall color, ceiling height, the artist’s medium, and the environments in which the work will normally be displayed.
Consistency is often more important than selecting one supposedly perfect Kelvin number. Mixing warm ceiling bulbs, cool task lights, and changing daylight can make accurate color judgment difficult.
Neutral or lightly colored walls are generally preferable around the main painting area because strongly colored walls can reflect their hue onto the canvas and palette.
Lux Versus Lumens
Lumens measure the total light emitted by a lamp or fixture. Lux measures how much of that light reaches a specific surface.
For an artist, the Lux reading on the canvas is more useful than the lumen number printed on the bulb’s packaging.
A practical target of approximately 800 to 1,200 Lux can work well for detailed painting, but it should be treated as a working range rather than a universal rule. The appropriate level depends on the medium, the scale of the artwork, the artist’s vision, the reflectivity of the surface, and the expected display conditions.
Too little light can make color judgment difficult. Excessive illumination can cause the artist to produce work that later appears darker under ordinary gallery or residential lighting.
Measurements should be taken at the canvas rather than directly beneath the light fixture. Test the upper, central, lower, left, and right areas of the working surface. The objective is an even distribution without dramatic bright or dark zones.
Measuring Light with a Smartphone
A professional Lux or color-temperature meter provides the most dependable measurements, but a smartphone application can be useful for preliminary comparisons.
Applications such as Light Meter LM-3000 or Photone may provide approximate readings, depending on the device, operating system, sensor, application version, and calibration method. Artists should confirm current availability and follow the instructions supplied by the application developer.
Some applications require a diffuser over a camera sensor. A small piece of white printer paper may be recommended for particular devices, but this method should not automatically be applied to every application.
Smartphone readings are best used to compare areas of the same studio and identify uneven lighting. When precise color documentation is required, use a calibrated meter and include a professional color-reference card in artwork photography.
Preventing Glare and Reflections
Lighting fixtures should be positioned high enough and at an appropriate angle to prevent light from shining directly into the artist’s eyes.
Wet oil paint, acrylic mediums, varnish, resin, glass, metal, and glossy photographic surfaces can create strong reflections. Instead of increasing brightness, adjust the direction, height, and distance of the fixtures.
Two balanced light sources positioned to the sides of the working area can produce more even illumination than one extremely bright lamp directly above the canvas.
The Invisible Zone: Ventilation and Studio Safety
Safety should not be treated as a separate activity performed after the studio has been designed. It must be integrated into every zone.
Paints, adhesives, solvents, resins, aerosols, pigments, ceramic materials, and cleaning products may introduce vapor, dust, skin-contact, fire, or contamination risks. The hazard depends on the exact material and method of use.
Ventilation is especially important when working with volatile solvents or spray applications. Opening a window may improve general air movement, but it does not necessarily remove contaminants at their source. NIOSH identifies local exhaust ventilation as an engineering control capable of capturing airborne emissions before they spread through the room.
Occupational safety guidance recommends substituting water-based products when practical, using the smallest effective quantity of solvent and providing appropriate ventilation when safer substitutions are not possible.
A 2026 NIOSH report concerning a school art studio found metals on every tested surface and recommended better housekeeping, wet-cleaning methods, improved ventilation, and consistent hand hygiene. Although every studio is different, the findings demonstrate why dust and invisible residues should not be ignored.
Artists should:
- Read product labels and Safety Data Sheets.
- Keep materials in their original or properly labeled containers.
- Avoid eating or drinking in active material zones.
- Wash hands after working.
- Use wet-cleaning or appropriate filtered vacuum methods for hazardous dust.
- Keep exits and walking paths unobstructed.
- Separate clean office equipment from dusty or solvent-based processes.
- Follow local requirements for storing and disposing of paints, solvents, resins, contaminated rags, and other hazardous waste.
- Obtain professional advice when installing extraction systems or working with materials that produce toxic, combustible, or explosive vapors.
Respirators should not be treated as a substitute for ventilation. Selection depends on the specific contaminant, concentration, filter type, facial fit, and working conditions.
Ergonomics for a Sustainable Artistic Practice
Artists frequently repeat the same gestures for hours, lean toward a canvas, grip tools tightly, lift large works, or remain in static positions.
An ergonomically designed studio adapts to the artist rather than forcing the artist’s body to adapt continuously to the room.
The easel height should allow work without prolonged neck flexion or raised shoulders. Tools should be placed within comfortable reach. Large or heavy artworks should be moved with assistance or appropriate equipment. A supportive stool, adjustable table, anti-fatigue mat, and scheduled changes of position can reduce unnecessary strain.
NIOSH defines ergonomics as designing tasks and work environments to fit human capabilities, with the objective of reducing discomfort and work-related musculoskeletal disorders.
The most sophisticated studio is not the one with the most equipment. It is the one that allows the artist to continue working without sacrificing health.
Designing a Studio That Can Evolve
An art studio is never entirely finished. It changes as the artist develops new bodies of work, adopts different materials, produces larger pieces, begins teaching, records videos, or prepares for exhibitions.
The most effective studio furniture is therefore movable, modular, adjustable, or capable of serving more than one purpose.
Before purchasing additional equipment, ask:
Does this object support my current practice?
Can it serve more than one function?
Where will it be stored when it is not being used?
Will it improve the workflow or create another obstacle?
Can I clean safely around it?
A successful small studio combines flexible zoning, vertical storage, accurate lighting, ventilation, ergonomic furniture, digital documentation, and clearly defined working routines.
The goal is not to reproduce the romantic image of the enormous artist’s loft. It is to create a space in which beginning becomes easier.
Ultimately, the best studio is the one that invites the artist to enter, concentrate, experiment, make mistakes, and continue working. Its value is not measured by its square footage, but by the creative life it makes possible.